Crispy {baked} Tofu with Spicy Scallion Sauce

Took a bit of a hiatus due to personal things going on but now I’m baaaaaaack 🙂

DSC_9285

This year for Lent, when my brother Ray said he was going vegan (to give up eating all animal products), my hubby Steve & I jumped on that opportunity. We’ve really been trying to eat more vegetarian for a while now, so going vegan would be a new challenge for us.  And, I have to say, it has been!

But we all bounced ideas off each other for good recipes and this one in particular was a huge hit, even with my parents who weren’t doing the vegan thing.  This was definitely my most cooked vegan meal and it’ll be on rotation even after.  It was THAT. GOOD. I remember eating this a lot in college when my awesome friend (& roommate!) Karen would whip this up for our us and our friends.  It was so easy (and cheap to boot!) and now it’s one of my go-to recipes.

With Karen’s permission, I’m sharing with you one of the best Asian recipes I’ve ever had, hands down – made by her super cool mom (a.k.a. Momma Chiang —  Thank you!!)  What really makes it is the spicy garlicky scallion sauce.  SO. GOOD. 😀 (yes, I said it again!)

So without further ado…

Momma Chiang’s Crispy Tofu with Spicy Scallion Sauce

Serves 2

Ingredients

  • 1 block of firm or very firm tofu
  • 1 bunch of scallions
  • 1 small head of garlic (or 6-8 cloves)
  • ~3 Tbsp of soy sauce or tamari
  • Sriracha sauce (about 1 tsp or 1 Tbsp, to your tastes)

Method:

  • Slice the tofu into thin blocks so they are about 1/2″-3/4″ thick.
  • Drain the water from the tofu by placing it on a plate lined with paper towels. Put more paper towels and another plate on top and gently press down. Do this until most of the water comes out and the tofu feels firm.
    • It’s useful to do this the night before – you can place a weight on top of the plates to let it drain on its own.  You can cut thinner tofu slices for crunchier tofu or thicker for something a bit chewier.

While the tofu drains, make the sauce:

  • Mince all of the garlic and chop up all of the scallions.
  • In a sauce pan, heat oil (I used ~2-3 Tbsp of olive oil). When it is hot, add the garlic and cook until fragrant or slightly golden brown.
  • Add in the scallions. Add more olive oil if needed; you want a nice sauce.  Saute for about 2-3 minutes, just until the scallions are cooked and wilted.
  • Add soy sauce to the sauce pan and stir.
  • Add in the Sriracha sauce and stir until it has become a thick and almost paste-like consistency.
  • Remove from heat and set aside.

To cook the tofu, there are 3 options.  Karen recommends frying (it is the best way to have it) but if you’re eating it fairly often like I’ve been, try baking and broiling the tofu.  All 3 ways are delicious. See below:

  • To fry:  Fill a deep pan with about 1/4″ thick of your oil of choice and heat for ~3-4 min. (You want enough oil to cover the tofu half-way.) Fry until golden (or desired crispiness) and flip to cook the other side. Place on a paper towel-lined plate to drain excess oil.
  • To bake:  Preheat oven to 350 degrees. Place on a parchment or foil-lined baking sheet and bake for about 20 min until golden (or desired crispiness), flipping half-way through.
  • To broil:  Turn broiler on to high.  Place on a parchment or foil-lined baking sheet and bake for about 10 min (or desired crispiness), flipping half-way through.
  • Place the sauce on top to your desired amount/taste.

ENJOY with your favorite vegetable stir-fry over rice or noodles!

DSC_9286

For those interested, here are some thoughts on Veganism…

First of all, I believe that no one diet works for everyone.  And it couldn’t have been truer this time around.  My brother, husband and I all agreed that this diet made us all hungrier (we wanted to eat more and more often!) yet we all lost weight.  We also found that it was very, very hard to eat out as a vegan – definitely a plus for our waistlines and our wallets.  But each of us had slightly different reactions.

I felt pretty good most of the time, though I craved red meat more than usual. Seriously. A burger, some steak, something! (Probably shouldn’t have watched all those Diners, Drive-ins and Dives episodes…)  I think it’s telling that my body needs more of the iron that comes from red meat.  My husband had ups & downs with it – he’s felt okay overall too but has had headaches and stomach issues at certain points. Not his favorite diet to say the least. And my brother was definitely more experimental – he tried seitan, tempeh and soy cheese.  He did fine with those products, but they weren’t his favorite (especially the “cheese”).  Overall though, he reacted similarly to me – no major issues but he said that his love of animal products “grew tenfold”. Lol.

Steve and I concluded that we’re not going to be vegan forever, but we may continue the good habits of incorporating a lot more vegetables in our diets and really reduce our consumption of meat and dairy (tough for me because I love cheese!)

Final thoughts…

  • Everything in moderation – We gave up all animal products cold turkey – not a good idea.  If you’d like to try veganism or any diet, do it gradually and add in!
  • Don’t deprive yourself of anything – You’ll only want it more. 
  • Follow what your body needs – It knows what it needs, so don’t ignore it.
  • Cook & eat more whole foods, less processed foods. – Cook when you can, adding in more & various types of veggies at every meal, less boxed/canned/bagged stuff

Thanks for reading! xo

Arroz Caldo (Rice & Chicken Ginger Stew)

I’m sick. For the second time. In a month. Yuck. It’s definitely not a fun feeling, especially after not having been sick in over 2 years. Since Steve (the hubby) and I began to transition to a whole foods, less-processed foods lifestyle, we’ve noticed the effects on our health. And since then (up until now), we haven’t really gotten the colds/illnesses we’d fall prey to every year. However, this year, I’d guess  that a combination of holiday indulging, traveling for a family wedding and lack of sleep has left me susceptible to whatever has been going around.

So of course, what am I craving? Something warm and comforting, like the traditional Filipino dish called Arroz Caldo.

DSC_9094

Literally meaning, “hot rice”, it’s a dish that I’ll admit as a child I used to say, “We’re having that again?” whenever we had it for dinner.  It reminded me of being sick because my mom would make it often when we didn’t feel good.

DSC_9092

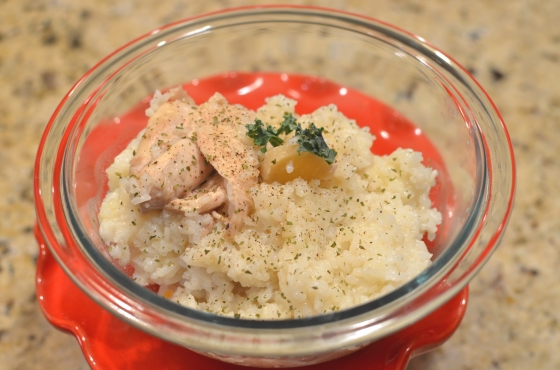
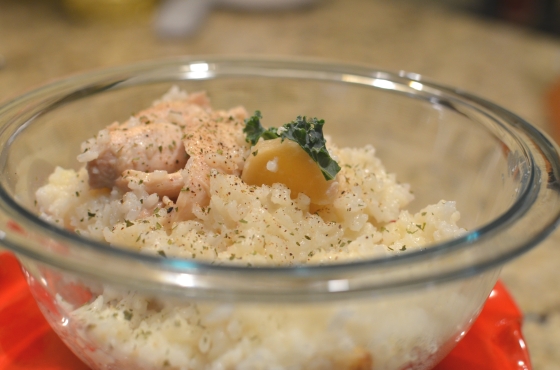
But now, not only do I love it, but I totally appreciate why we had it as often as we did. It’s comforting (like chicken soup) and filling & hearty.  It’s such a simple dish with complex flavors and utilizes ingredients that most people already have in their kitchen: chicken, rice, ginger, garlic, salt & pepper and water/broth. That’s it. Other variations have hard-boiled eggs, chopped scallions, crispy fried garlic on top. But I kept it simple making it the way my mom does. You really can’t mess with what’s good, you know?

Some people liken the dish to congee, a Chinese rice porridge, but this version is slightly less soupy and flavored to Filipino tastes. Hope you enjoy this. Go make some, sick or not, on a cold day or warm day; you’ll love it.

Arroz Caldo

Inspired by my mom & Filipino cooks everywhere

Ingredients:

  • 2-4 pieces of chicken (any combination; I used 4 boneless, skinless thighs)
  • 2 cups white rice
  • 2 cloves garlic, chopped
  • 6-8 cups water or broth
  • If using water, add 1 bouillon cube (I use a natural, vegan brand that doesn’t have MSG, trans fats or hydrogenated oils)
  • 1-2 Tbsp salt, to taste
  • 1 tsp pepper
  • chopped scallions, optional

Method:

In a heavy stockpot (such as a dutch oven), heat 1 Tbsp of oil. Sautee garlic for a few moments until golden and remove. If you’d like, you can add your chicken pieces now to brown slightly. Then add rice, water/broth and seasonings. Give the mixture a stir and cover.

Bring the stew to a light boil and stir. Then lower the heat, cover and cook for about 25 minutes, until rice is at desired consistency.  If you want it to be more “soupy”, you can add more water/broth.  Add salt and pepper to taste.

Serve hot with a side of chopped scallions and crispy fried garlic if desired.

DSC_9089

Butternut Squash Gnocchi

I know, I know. I’m a little late to the Fall recipe party. And it’s almost Christmas, but bear with me – this recipe is worth reverting back for 🙂

DSC_7602

Recent outside temps (it was nearly 60 degrees this week) tell me it’s still fall. Well, at least in my mind and in my kitchen, that is. 🙂 Hence, the sugar pumpkin and butternut squash you see above waiting to be roasted and pureed into something tasty.

DSC_7609

Like butternut squash gnocchi. Mmmm… so good! It’s a very fall-inspired dish (that can be eaten in winter, too) and is pretty simple to make. I love gnocchi and homemade is really the only way to go. It’s light & fluffy and you can pretty much flavor it how you want.  The squash makes it less heavy than traditional potato gnocchi and gives it a nice flavor. And as with most of my recipes, you can freeze them, too.

Sauteed Butternut Squash Gnocchi with Broccoli Rabe

Inspired by this recipe.

Ingredients:

  • 2 cups butternut squash or pumpkin puree (I made my own using the method in the inspiration recipe)
  • 1/2 teaspoon salt
  • 1 egg
  • 2-1/4 cups whole-wheat pastry flour, plus more for rolling
  • 1 bunch broccoli rabe (or green of choice), cleaned, chopped and blanched
  • 2 cloves garlic, chopped

Method:

In a bowl, mix together squash, egg and salt.  Gradually add in flour to make a loose dough. (Don’t overmix). Flour your clean work surface and gently knead until dough comes together. Be mindful of how much flour you add; it will dictate how dense or heavy your gnocchi will be.

Break off a palm-sized portion of dough, working only one section at a time (keep the rest of the dough covered with a damp dish cloth/paper towel). Roll dough into a thin rope, about 1/2 inch in diameter, depending on how large you want your pieces to be. Cut 1″ pieces from the rope and if you want to be fancy, use the tines of a fork to make the traditional gnocchi “marks” like so. (Unless you’re lucky enough to own one of these. Now that’s fancy.) To keep gnocchi from sticking together, lightly coat each piece with flour and lay out on a lined baking sheet. Continue the process until all of the dough is used — this is the part where it helps to have a partner or sous chef help you out!

To cook now: Bring a pot of water to boil and salt well.  When boiling, slowly drop in gnocchi, making sure to keep each piece separated (otherwise you’ll have one lump of gnocchi). You’ll know it’s finished when they float to the top – they cook rather quickly. Drain carefully, or use a slotted spoon to gently fish them out. Set aside.

Make your broccoli rabe by sautéing in a shallow saucepan with a bit of olive/coconut oil and chopped garlic.  Add salt and pepper to taste and remove from pan. Add gnocchi and lightly season to taste. Cook for 5 minutes or to desired “done-ness” and enjoy with cooked broccoli rabe.

To freeze for later: Lay each piece of gnocchi individually on a lined baking sheet/tray (separated & lightly coated with flour as needed).  Freeze for 2-4 hours. Remove from the freezer and store frozen gnocchi in a zip lock bag or air-tight container.*

* Doing the double freeze method  is key so you don’t get a large frozen lump of gnocchi. (I’m not sure how long they would keep, but my guess is up to 6 months or so. It never lasts that long in my freezer!)

Delicious. Fall-icious. Winter recipes to come soon, I promise… I think 😉

DSC_7607

Cauliflower, 2 ways

Much like the world of fashion, the culinary world has its trends. Colored jeans, skinny ties and peplum in fashion are to cupcakes, food trucks and gluten-free in food.

The latest thing? Cauliflower. What was once a bland, boring cousin of the ever-popular broccoli, cauliflower has made its big break 🙂 Cauliflower is a nutrient-dense food, providing lots of vitamins & minerals (such as vitamin C and folate) with little calories. It’s also a low-carb, high-fiber vegetable with properties that may slow the growth of some cancers (source).

Widely used among the gluten-free, grain-free and Paleo diets, cauliflower can be prepared in so many different ways, which makes it even more appealing. A popular recipe found all over the interwebs is cauliflower rice, but let me introduce you to 2 of my favorites – Cauliflower Pancakes and Cauliflower Mash.  What’s great about these is you can cook both at the same time and have enough for 2 side dishes: A concept called Cook Once, Eat Twice. Brilliant and economical.

Cauliflower Pancakes

Inspired by my mother-in-law!

Ingredients:

  • 1 head of cauliflower (only 1/2 will be used for this recipe)
  • 1 egg
  • 3/4 cup to 1 cup of whole-wheat flour (or all-purpose)
  • 2 Tbsp. salt
  • 1/2 tsp. of cayenne*
  • 1 Tbsp. oil (olive, grapeseed or coconut)

Method:

Bring a pot of water to boil. Remove green stem and leaves from the cauliflower and rinse lightly, removing any loose dirt. Cut into medium-sized florets. Add 1 Tbsp. of salt to the boiling water and add the cauliflower. Boil for 5-7 minutes, depending on how large the florets are. Once the cauliflower is soft enough to mash, drain and divide the cauliflower in 2 separate bowls (you’ll only need 1 bowl of the cauliflower for this recipe).

Lightly mash the cauliflower until you have small pieces. Add the egg, flour, cayenne and the rest of salt. Mix until you have a thick batter. Heat a cast iron skillet or non-stick pan and add oil when pan is hot. Ladle about 2 Tbsp. of the cauliflower mixture into the pan and flatten into a pancake. Cook on each side for about 3-5 min or until golden brown, being careful not to break them apart. You may need to add oil to the pan and lower the heat as needed.

Makes roughly 10-12 pancakes depending on how large you make them.  They refrigerate and/or freeze well. Careful, these are addicting.

*Feel free to add other spices or herbs to taste such as pepper, paprika, garlic powder or parsley, just to name a few. I haven’t tried any of these but I imagine they’d be delicious.

On to recipe #2…

Doesn’t that look like a big, heavy bowl of mashed potatoes? It’s pretty darn close in flavor and texture, but much lighter, healthier and just as comforting.
.
Cauliflower Mash
.
Ingredients:
.
  • 1/2 head of cauliflower, boiled from previous recipe
  • 3 small potatoes*, boiled (optional)
  • 1/2 cup of milk, dairy or non-dairy
  • 1 Tbsp. of butter  or olive oil (optional)
  • Pinch of paprika
  • Salt & pepper to taste
Method:
.
Place all ingredients into a food processor or blender. (This recipe is easiest to make when cauliflower is still warm.) Slowly process/blend until cauliflower/potatoes comes together to the consistency you like – process less for a chunkier mash, more for a creamier, puree-like texture. Add a small pat of butter and a sprinkle of paprika on top.
.
*I added the potatoes to the boiling water and processed them with the cauliflower to make it thicker like mashed potatoes.
.
Two side-dishes, one main ingredient. Pretty good deal if you ask me.  And because it’s a low-carb vegetable, maybe now you can fit into those colored, skinny, peplum jeans** you’ve been eyeing. 😛
.
.
**kidding. Totally made that up.

Chocolate Truffle Brownie Bites

SUGAR. My arch nemesis.

As someone who’s been trying to eat well and maintain healthy habits, trying to reduce my sugar intake has been one of the hardest things to do, especially since I’ve had a sweet tooth all my life (let’s not discuss how well I knew my childhood dentist! :-P)  I’ve really tried to find healthier ways to satisfy those sugar cravings. And I think I’ve found a way!

WOW. That was my reaction the first time I made these. A chocolatey, brownie-like treat that’s sugar-free and actually healthy?! No way. But I promise you, they are!

As if that wasn’t good enough, they only take 5 minutes to make, with only 5 ingredients.

I’ve seen them called by different names with slight variations to them (raw brownie bitesvegan truffles). But these, called fudge babies by Chocolate Covered Katie, were the first I’ve tried, and probably the best. (She makes other amazing vegan desserts that you would never believe were vegan!)

Try them and tell me that they’re not going to change your life. {dramatic pause} 🙂 Enjoy!

Chocolate Truffle Brownie Bites

Inspired by Chocolate-Covered Katie.

Ingredients:

  • 1/2 cup each of walnuts and almonds (raw, unsalted) or 1 cup of any nuts you choose
  • 1 1/3 cup of pitted dates (softened by letting sit at room temperature or warmed slightly in the microwave if necessary)
  • 3-4 Tbsp. of cocoa powder (dark if you have it)
  • 1 tsp. vanilla extract
  • 1/8 tsp. salt
  • only as needed: 1 tsp water
  • optional: shredded unsweetened coconut or chopped nuts

Method:

Put all ingredients (in order) into a food-processor or high-powered blender (such as a Vitamix) and pulse on low-speed until ingredients come together. Continue to pulse/blend until mixture forms a loose “dough” (see note).  Form the dough into balls (yep, time to get your hands a little dirty!). If you’d like, roll into shredded unsweetened coconut or chopped nuts.

Store in the refrigerator or freezer.

Note:  If “dough” is too crumbly and doesn’t come together when you roll them into balls, scrape down the sides, add a tiny bit of water and pulse again.

5 ingredients and 5 minutes to a chocolatey dessert? Really, it can’t get any easier than that. Even my husband Steve (who would rather a salad instead of dessert!) actually liked these. Now that says something.

P.S.  When I asked Steve to help me with plating these brownie bites, the photo below is what he came up with 🙂  Hahaha. Gotta love it!

(Oh! And meet Leo, our pseudo puppy, a paper pug (obviously, lol) given to me by my best friend Helene. I have slight obsession with pugs and since I can’t have one due to allergies & my living situation, she gave me the next best thing. Cute, right? :))

Zucchini Tian

Ah, the zucchini. Mild, slightly sweet, and so versatile – it’s one of my favorite vegetables, ever. I usually sauté it, throw it in a stir-fry or cut them raw into thin ribbons for a salad (my favorite way to eat it). But when I came across this recipe in honor of Julia Child’s 100th birthday, I knew I had to make it.

It tastes rich but is actually really light and brings out the sweetness of the zucchini. The grated cheese adds a nice flavor but doesn’t overwhelm. It’s definitely something I’d make again. And you probably have all the ingredients in your refrigerator.

How delicious does that look?! (I say that in the humblest way possible :))

Zucchini Tian (Tian de Courgettes au Riz)

From “Mastering the Art of French Cooking Volume Two” (Julia Child), via Food52

Ingredients:

  • 2 to 2 1/2 pounds zucchini – roughly 2-3 zucchini depending on the size
  • 1/2 cup uncooked white rice
  • 1 cup minced onions or shallots
  • 3 to 4 tablespoons olive oil
  • 2 large cloves garlic, mashed or finely minced
  • 2 tablespoons flour (I used whole-wheat)
  • About 2 1/2 cups warm liquid: zucchini juices plus milk, heated in a pan (I used unsweetened almond milk)
  • About 2/3 cups grated Parmesan cheese (save 2 tablespoons for later)
  • Salt and pepper
  • 2 tablespoons olive oil

Method:

Cut off the ends of the zucchini and scrub clean under running water. (If vegetables are large, halve or quarter them. If seeds are large and at all tough, and surrounding flesh is coarse rather than moist and crisp, cut out and discard the cores.)

Grate the zucchini using a food processor or box grater, and place in a colander set over a bowl. Sprinkle with salt and let the squash drain for 3 or 4 minutes, or until you are ready to proceed.

Just before cooking, squeeze a handful dry and taste. If the squash is too salty, rinse in a large bowl of cold water, taste again; rinse and drain again if necessary. Then squeeze gently by handfuls, letting juices run back into bowl. Dry on paper towels. Zucchini will not be fluffy; it is still dampish, but the excess liquid is out. (The pale-green, slightly saline juice drained and squeezed out of the zucchini has a certain faint flavor that can find its uses in vegetable soups, canned soups, or vegetable sauces.)

While the shredded zucchini is draining (reserve the juices,) drop the rice into boiling salted water, bring rapidly back to the boil, and boil exactly 5 minutes; drain and set aside.

In a large (11-inch) frying pan, cook the onions slowly in the oil for 8 to 10 minutes until tender and translucent. Raise heat slightly and stir several minutes until very lightly browned.

Stir in the grated and dried zucchini and garlic. Toss and turn for 5 to 6 minutes until the zucchini is almost tender. Sprinkle in the flour, stir over moderate heat for 2 minutes, and remove from heat.

Gradually stir in the 2 1/2 cups warm liquid (zucchini juices plus milk, heated gently in a pan — don’t let it get so hot that the milk curdles!). Make sure the flour is well blended and smooth.

Return over moderately high heat and bring to the simmer, stirring. Remove from the heat again, stir in the blanched rice and all but 2 tablespoons of the cheese. Taste very carefully for seasoning. Transfer into buttered baking dish, strew remaining cheese on top, and dribble the olive oil over the cheese.

Bake for 15-20 minutes or until tian starts to bubble. If you like, broil slightly to brown the top.

Serve it with grilled shrimp or chicken and a salad. Perfect.

Mmm…

Summer in a Glass

I know, I know, summer is almost over – but I’m going to enjoy every last minute while I still can, drinking this gorgeous and refreshing drink.  Packed with fresh and/or frozen mangoes, peaches, berries and bananas, this is my Summer in a Glass.

I added a tablespoon each of chia seeds and flax seeds for extra boost of omega-3s, antioxidants, protein & fiber (among other great things).  Don’t be afraid to add the seeds; all they do is add a slight bit of texture – I promise you won’t taste them!  This smoothie is so delicious, you wouldn’t guess it’s good for you.  It’s also a great recipe for those just starting out in the smoothie world.  Green smoothie recipes will come soon – don’t be scared 🙂 (I usually blend in a cup or two of greens but shockingly, I was out!)

Summer in a Glass Smoothie

Serves 2

Ingredients:

  • 2 fresh mangoes, diced (about 2 cups)
  • 1 peach or nectarine, diced
  • 1 cup of berries, fresh or frozen (I used frozen)
  • 1 frozen banana, sliced*
  • 1/4 – 1/2 cup of liquid of choice (I used water but sugar-free juice or any kind of milk would work)
  • 1 tbsp chia seeds
  • 1 tbsp flax seeds, preferably ground
  • ice cubes as needed

*Peelslice and freeze bananas ahead of time for really thick & creamy smoothies.

Method

Throw the ingredients (in order) into a blender or Vitamix and blend away until smooth. Blend in ice cubes for a thicker, frothier smoothie. Add water/milk for a thinner, more liquid-like one.

Pour into a pretty glass and drink with a straw – trust me, it’s much tastier this way 🙂

Quick tip about fruit for smoothies — I try to have a 50/50 mix of fresh and frozen fruits (and veggies!) in all my smoothies. The frozen makes things colder with a thicker consistency (my husband’s preference).

Oh summer, won’t you stay just a little while longer?  September & October won’t mind!

The Most Versatile Dip Ever!

Is it a dip? Or is it a pesto? Whatever you call it, I call it delicious 🙂

This concoction of leafy greens, artichokes, nuts and oil all whipped up together = good-for-you perfection. It’s packed with healthy, mostly-raw ingredients (the way nature intended them) and is just so delicious on everything.

It can be tailored to your tastes and to what ingredients you have on hand (hence why I called it versatile!). Don’t have arugula? Try baby spinach, kale, basil or parsley. Substitute the artichokes for roasted red peppers or omit them all together. Add a few olives. Make it more hummus-y by throwing in some beans. Use up leftover cooked sweet potatoes. Try melted coconut oil instead of olive. Add chia or flax seeds for extra nutrition; Parmesan cheese for a salty bite. You get the idea: the possibilities are endless and it’s a great way to use up some leftover healthy ingredients you may have at home.

This recipe is definitely one of my favorites and a staple in my house.  It’s also a big crowd pleaser – I served it at my family’s Christmas Eve party with carrots and cucumber slices and everyone, including the vegetable-averse, loved it! That was a proud moment, for sure 🙂

Artichoke-Greens Pesto Dip

Serves 5-10 as a dip, 4-6 over pasta

Ingredients:

  • 1/2 cup walnuts/almonds/cashews or a mix
  • 1 package of frozen artichokes, thawed or 1 can/jar of drained artichokes
  • 1 cup of loosely packed greens; I used baby arugula
  • Extra virgin olive oil – 1/4 cup, more or less depending on desired consistency
  • Salt & pepper to taste
  • 1/4 cup of imported grated Grana Padano or Parmesan cheese (optional)
  • 1 Tbsp. chia seeds (optional)

Directions:

Place all your ingredients (except for the oil) in the food processor.  Begin to pulse until everything starts to come together, then slowly drizzle olive oil until you reach the consistency you want.  I generally enjoy this more as a chunky dip so I don’t process it too much. For a more pesto-like consistency, continue to process and add more oil or even some broth.

Best enjoyed at room temperature or warmed in the oven. This dip stores well – I’ve kept it for 2 weeks in my refrigerator (when I serve it, I let it sit out for a bit to get to room temperature). I imagine it would freeze well, too, especially if you left out the cheese.

Now go forth and make dip.. pesto.. dip..

For Dinner, with Love (part 2)

Here is Part 2 of our Valentine’s Day dinner: the “healthy” course!

We enjoyed a small portion of the very rich and delicious Truffle Macaroni & Cheese as our starter and finished off the meal with this lovely flounder, simply baked in parchment with lemon and some rice and broccoli rabe on the side.

I would have normally made whole wheat pasta, quinoa or brown rice, but since it was my Valentine’s gift to Steve, I made his favorite – white rice.

The odd thing about this dinner, though is that anyone who knows Steve knows that he’s not a seafood person at all. Sooo why on earth would I make him fish, you ask? Well, because he requested it! The wonderful thing about my husband is that when he knows how good something is for you (like fish), he’ll try it. He tries to eat a healthy, balanced diet (I’m a lucky girl :)) so that was what he asked for. And his wish was granted.

It came out quite tasty (not “fishy” at all) and was so easy peasy. Simple flavors and simple cooking methods made for a fish dish that I’ll happily make again!

Parchment-Baked Flounder with Rice and Sauteed Broccoli Rabe

Serves 2, plus leftovers for lunch

Ingredients:

  • 4 flounder filets (about 2 lbs.)
  • 1 small lemon, cut into slices
  • 1-2 tsp garlic salt
  • 1 tsp black pepper
  • 1 bunch broccoli rabe, trimmed, thoroughly washed & roughly chopped
  • 2 cloves of garlic
  • 1/2 cup chicken or vegetable broth, have more handy if needed
  • Extra Virgin olive oil
  • 1 cup white rice

Method:

Preheat oven to 350 degrees.  Cook the rice using the method you usually use (I have a rice cooker, but stove top is fine). Clean fish and pat dry. Prepare 4 sheets of parchment paper – make sure to leave enough room to fold and enclose the fish.

Pour broth into a large saucepan and when it begins to boil, toss in the broccoli rabe. Cover and let broccoli “water saute”/steam for 5-7 minutes or until desired tenderness.

While broccoli cooks, prepare the fish. Place each filet on a piece of parchment, drizzle with a touch of olive oil and season with garlic salt, pepper and a slice of lemon on top. Feel free to add any other spices you like.  Fold the parchment so that the fish is enclosed and that the juices won’t leak (this method is pretty brilliant. Wish I’d found it when I made this!)  Place the packets onto a baking sheet, for easier transport.  Bake for 15-20 minutes, depending on the type of fish.

Meanwhile, when the broccoli is almost done, season with salt and pepper and a drizzle of Extra Virgin Olive Oil — the health benefits of the oil remains intact if you don’t cook it down.

Lastly, plate everything and enjoy!

my date, about to dig in

For Dinner, with Love (part 1)

Ah, Valentine’s Day. To some, the lovers’ holiday. To others, the flower-greeting card-chocolate industry’s holiday.

To us, it’s the let’s-stay-in-and-cook-something-fancy holiday!

As has been tradition for the past 3 years (as a married couple), my husband Steve and I keep it low-key, creative and inexpensive by forgoing the big gifts & restaurant meals by staying in with a movie and whipping up our own spin on a gourmet meal. For our first, I think we made shrimp & scallops with risotto, asparagus, roasted yellow peppers and mini chocolate molten cakes for dessert. Quite decadent. The second year, we went a little lighter and Steve cooked! He made this amazing Asian-inspired salmon/cod (he doesn’t like salmon) with asparagus (again! lol) over white rice. And then homemade peanut butter cups made by yours truly for dessert.

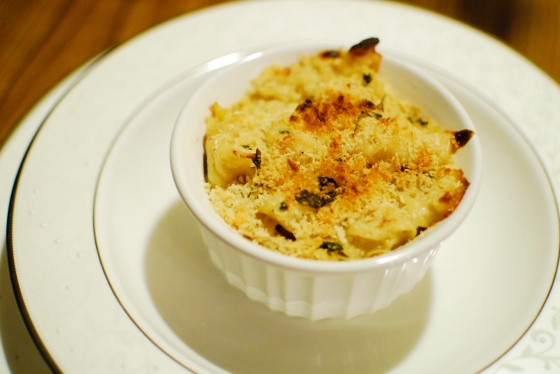
This year, we decided to do 2 small courses: truffle macaroni & cheese and parchment baked fish over broccoli rabe & rice. (We had dessert, too, but it was a bit of a flop so I didn’t take photos of it.) The truffle was inspired by our recent trip to Paris, where I had truffles and truffle oil for the first time and fell in love. We bought a tiny (and pricey!) bottle of white truffle oil and it was just the perfect touch to the dish. Though we rarely have decadent dishes like this one, I decided to cut down the amount of cheese a little and added more pasta to stretch the sauce a bit. It made for great leftovers!

Truffle Macaroni & Cheese

Adapted from Kasey Buick. Serves 8 (or 2 plus enough leftovers for several days!)

Ingredients:

  • 1 lb. fresh pasta (or dried)
  • 4 tbsp organic butter (original calls for unsalted; I only had salted and cut back on the salt)
  • 4 tbsp flour
  • 3 cups HOT milk*
  • 1 tsp ground pepper
  • 1/2 tsp ground nutmeg
  • 1/4 tsp cayenne pepper (or less if you want less of a kick)
  • 1 1/2 cups of freshly grated cheese (I did roughly 1/2 cup each of Gruyere, Fontina and White Cheddar)
  • 1/4 cup parmesan cheese
  • 1/4 cup panko bread crumbs
  • 1 tbsp chopped parsley
  • 1 tbsp white truffle oil and a little more for finishing
  • Salt to taste
  • 8 ramekins (or whatever baking dishes you have on hand)

Method:

*Have a small pot of the milk lightly simmering when you begin. It helps to have it handy.

Preheat oven to 350 degrees.  Boil water for the pasta and prepare according to package directions. Set aside.

Heat the butter over medium heat in a heavy saucepan until it begins to bubble, but not brown. Whisk in the flour to create a roux for the white-sauce base. Cook the flour and butter over low heat for 5 min. Then slowly pour the milk in a steady stream while whisking. Cook for about 8 minutes or until thickened. Add pepper, 1 tbsp truffle oil, cayenne pepper and nutmeg.  Stir in the Gruyere, Fontina & White cheddar. Continue to cook over low heat for about 2 more minutes until smooth. Taste and add salt as needed (not too much!).

Add cooked pasta to the cheese sauce and carefully stir together. Remove from heat. Pour into ramekins (for individual-sized portions).

Prepare the breadcrumb topping: mix the panko breadcrumbs, parmesan cheese and parsley. Sprinkle over the top of the pasta.

Bake for 15-20 minutes or until bubbly. I also put mine under the broiler for about 5 minutes to get the breadcrumbs nice and crispy.

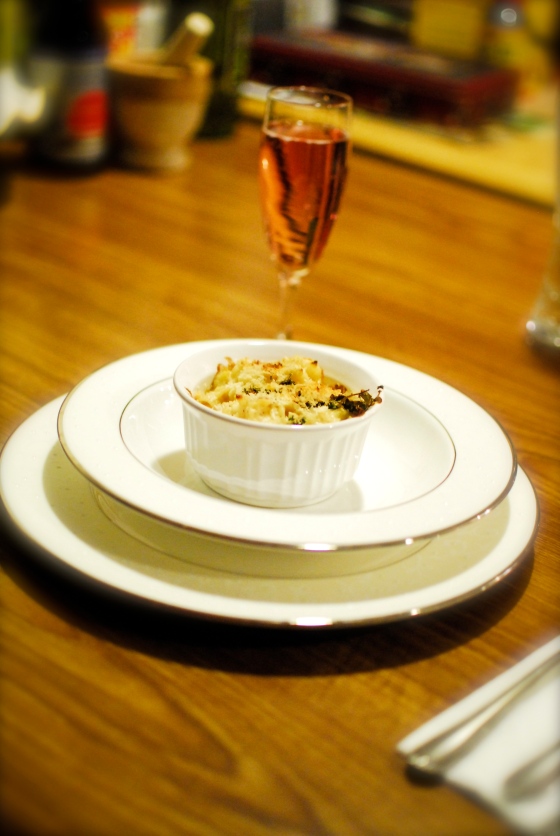
This was soooo good. And yes, that is pink champagne! My dear husband knew I’ve been wanting to try it (a la my favorite movie “An Affair to Remember) and bought us some. It’s my new favorite. 🙂

The fish recipe will follow soon!